Pages

Thursday, June 2, 2011

We Have a Bedroom, at Last!

We have been busy. We spend most of that busy time working on the bedroom.

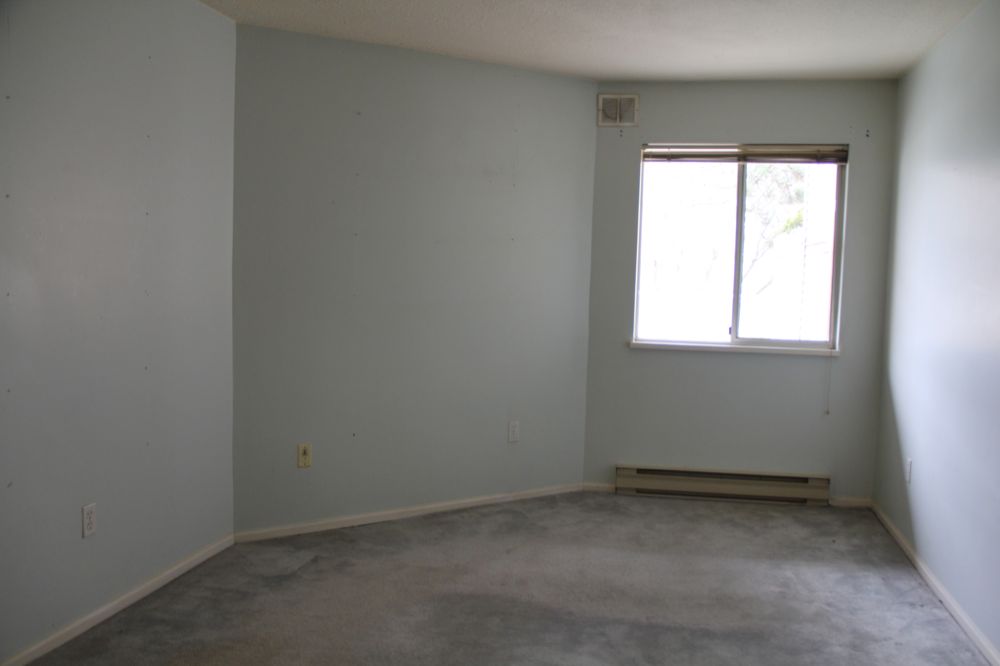
Here's what it looked like when we first moved in.


After ripping the carpet, replacing it with laminate, painting the walls and filling it with some furniture, it now looks like this.


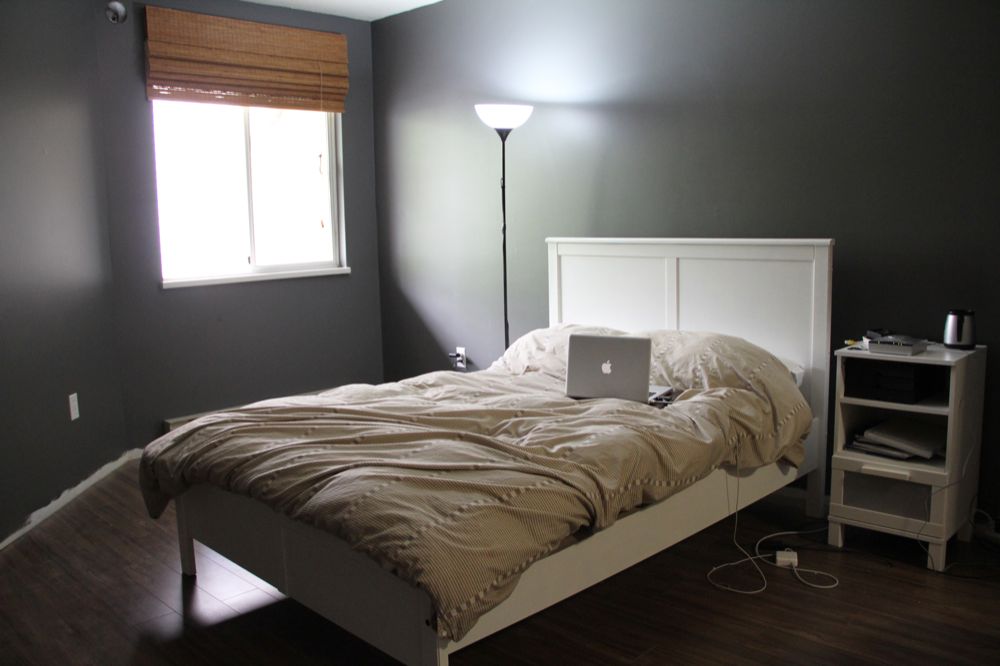
We love love love the floor and the wall color. Just the paint and the flooring alone changed the room so much. It now feels more like it's ours.

Ever since he was a child, Vee has always wanted a black bedroom. But came painting time, his family vetoed his black bedroom proposal. I couldn't bring myself to agree to a black bedroom at first, but several awesome pictures were all it took to convince me. I mean, look at these and tell me they're not breathtakingly chic.

Jenna Lyons' home as featured on Canadian House and Home website.
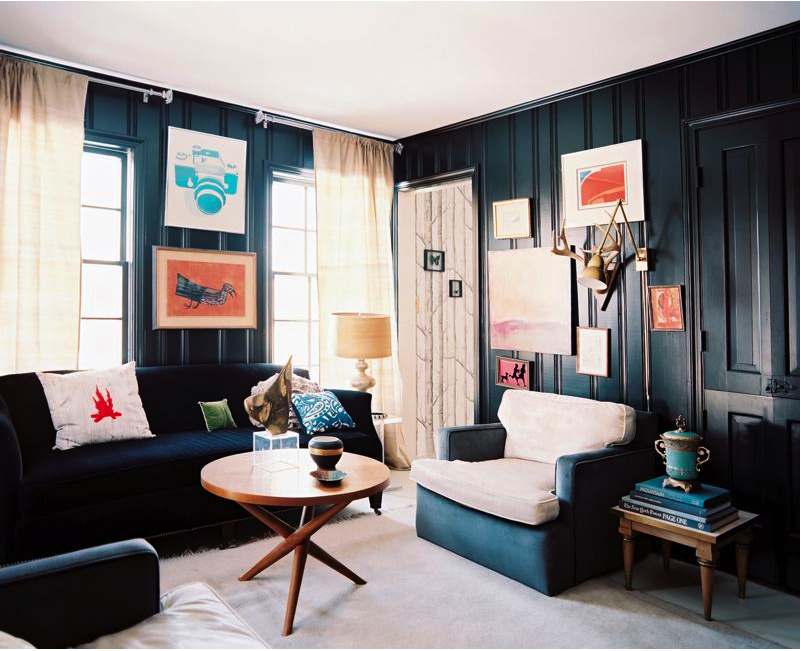
A living room from March/April 2011 issue of Lonny Magazine.

I couldn't agree to stark black, but we reached a happy agreement with dark gray (Benjamin Moore Kendall Charcoal). It does make the room seem smaller, but it feels really cozy now and isn't that how a bedroom should be?

When painting, we removed some fittings and found that the room was once yellow before it was painted pale blue.


I love finding things like this. I can only imagine the next owner painting the room years from now and discovering dark gray paint underneath and wondering whether the previous painters (that would be us) were mad.

We also replaced the cheap-looking, yellowing plastic shutters with bamboo Roman blinds (Serenity Privacy Roman Blinds by Frontier Blinds). We scored the blinds at a 60 percent discount at the local Rona store, so it was only a little over $30.

Our building management only allows white and cream window treatments to make the windows all look uniform from the outside. We couldn't find any white blinds we like, and then I saw that Thrifty Decor Chick had successfully spray-painted some bamboo blinds. So we decided to spray-paint the bamboo blinds white, but that didn't go exactly according to plan.

First, we couldn't get even coverage, so we had to go back to the store to get a spray-paint gun. By the way, that thing is the shiz; it's a must-have for spray painting. Get it and your fingers will thank you for not subjecting them to the torture that is holding a spray-paint can nozzle for longer than one minute. The gun really helped me get an even coverage. The trick is to apply a steady pressure on the trigger, putting on two to three thin coats and working in sections. But even after going through the second can, I had only finished painting one side of the blinds.

Uneven paint coverage, BSPG (before spray-paint gun).
The good thing is that the bamboo was tightly woven and the white paint didn't get on the other side at all. So with one side already painted white, we decided to leave the other side bare. It was easier that way, and we also figured the natural bamboo color would look good in the bedroom.

Looks perfectly white from outside!
And the tight weave has another perk: it provides excellent light block.

We can wake up as late as we want!
With proper flooring and window covering, the bedroom is now functional. Everything we've done so far has turned out great and we love it maybe a little too much.

Wednesday, June 1, 2011

10 Ways to Mess Up a Bathroom Caulk Job

Our bathroom has a line of grout along the joint where there should be caulk instead. Grout, usually used to fill gaps between tiles, doesn't expand and will definitely crack when the bathtub or the tiled surface expands and contracts. Nobody should ever apply grout where the tiled surface meets the bathtub, but apparently this is a pretty common mistake. Just look at this cracking horror.


Because cracks can lead to water seeping into the drywall and rotting the building material, we decided to remove the grout and apply caulk instead. We set out thinking this would be an easy job that would take 10 minutes, max. We ended up taking a few days and messing up our caulk lines.

To help anyone looking to get artistically uneven caulk lines, we put together a short how-to.

1. Watch some caulking videos on Youtube and go, "Huh, that looks so easy, I'll nail it in no time."

2. Be a cheapskate and just buy the caulk in a squeeze tube because the pros in the videos use so little of the stuff.

3. Apply a fat bead of caulk along the joints because the tube opening is too big to easily control.

4. Scrap off all the caulk you just applied because it's beyond ugly and reapply until you use up all the caulk in the tube.

5. Remove all the caulk you applied and tell yourself you'd do it right next time.

6. Buy the correct products: caulk, caulk gun and tape.

7. Paste tape along the edges where the caulk will go.


8. Apply a squiggly, uneven line of caulk between the tape.


9. Use a coin that's too large for the job to remove the excess caulk. This helps you get bulging caulk edges because the flatter, narrower areas of the applied caulk is on the tapes.


10. Remove the tape and discover the beautifully messy caulk job.

Bonus points if you decide to live with the crazy caulk job because you haven't been showering for three days and you urgently need your regular showers back.

Double bonus points if you manage to get your hands to look like this.


Heaps of extra points if you got a fluffy white cat to condescendingly inspect your handiwork.


 PS: The videos on YouTube are actually really good; the fault lies entirely in us and our shaky hands. Some helpful videos:
http://www.youtube.com/watch?v=_XIf0deyzx4
http://www.youtube.com/watch?v=6TZL2yipTzE

Beautiful, Beautiful Floor

After almost two months of on-and-off work, our laminate floor project is finally done! This was a very big project for two people who didn't even own a screwdriver not too long ago. It took much longer than we thought, and for the first two weeks we had to live entirely in the living room because the bedroom had no proper flooring.

And that was why our living room looked like this...

Frat house? No. Try again.

Yep. That's where we slept. On the mattress on the floor. And right next to the "bed" was the sofa, which became our "wardrobe" since we didn't have anywhere to store our clothes yet.

We're really glad it's done, although it took much longer than we thought it would. We're really proud of ourselves, too. It's not a bad job, if I may say so myself.

Em checking to see whether our work was acceptable.

Some parts are kinda wonky...

Incredibly uneven lines!

But nobody will see these parts because they'll be out of sight once we install new baseboards.

Some parts we can't take credit for because a friend happens to have an uncle who works in construction and is willing to work in exchange for some shoes. Yes. Shoes. Vee gets many free shoes from his workplace and our friend's uncle happens to have the same shoe size. How great is that?

Somewhere along the way, Vee and I automatically divided tasks. I did the measuring and he did the cutting, then we did the installing together. It worked out faster that way. Also, Vee likes them boys' toys and I'm pretty good with numbers. The factory line model is not used worldwide for no reason, people.

By the way, Jay remarked that I was "very cool" for getting down and dirty with the flooring installation because he says girls don't usually do stuff like that. Few things please me more than being the anti-stereotype, laminate flooring finally installed being one of these few things.